Waffle Cone Recipe
Introduction
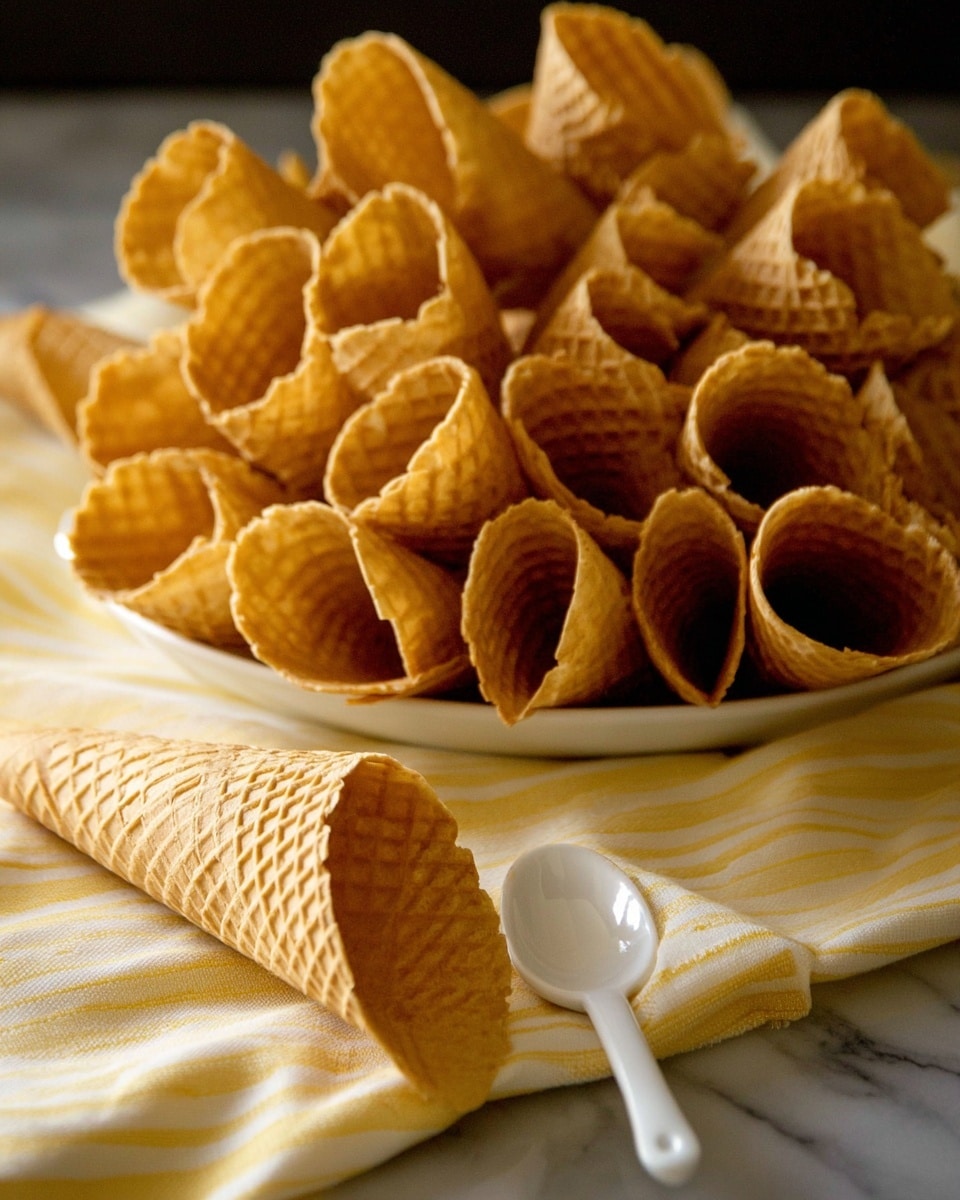
Making your own waffle cones at home is a fun way to elevate your ice cream experience. These crispy, sweet cones are freshly made and warm, adding a delightful crunch to each bite. With just a few simple ingredients, you can enjoy homemade cones anytime.

Ingredients
- 1 cup heavy cream
- 1 1/2 teaspoons vanilla extract
- 1 1/2 cups powdered sugar
- 1 1/2 cups all-purpose flour
- 1 tablespoon cornstarch
Instructions
- Step 1: In a bowl, use a whisk to whip the heavy cream with the vanilla extract until it has a mousse-like texture; it won’t form peaks.
- Step 2: Sift together the powdered sugar, flour, and cornstarch, then stir the dry ingredients into the whipped cream to form a smooth batter.
- Step 3: Let the batter rest for 30 minutes to thicken and develop flavor.
- Step 4: Preheat your waffle cone maker according to the manufacturer’s instructions. Cook the batter slightly longer than usual to avoid soggy cones, aiming for a light golden brown.
- Step 5: When the waffle is hot, quickly roll it around the cone mold provided with your waffle maker. Press firmly where the cone overlaps to seal it closed, and pinch the bottom to close the hole. Use a towel or gloves to protect your hands, as the waffles harden fast and are very hot.
Tips & Variations
- For extra flavor, add a teaspoon of cinnamon or a splash of almond extract to the batter.
- If you don’t have a waffle cone maker, a thin waffle iron or pizzelle maker can work as a substitute.
- Roll cones quickly but carefully to avoid cracking; warming the mold slightly can make shaping easier.
Storage
Store waffle cones in an airtight container at room temperature to keep them crisp for up to 3 days. Avoid humidity, as moisture will make them soggy. Reheating in a low oven for a few minutes can help restore crispness if needed.
How to Serve
Serve this delicious recipe with your favorite sides.
FAQs
Can I make the batter ahead of time?
It’s best to use the batter fresh or after resting it for 30 minutes. Storing batter for longer than a few hours may affect the texture and quality of the cones.
How do I prevent waffle cones from becoming soggy?
Make sure to bake the cones until they are slightly overdone for extra crispness. Store them in a dry, airtight container away from moisture. Also, avoid filling cones too far ahead of serving time to prevent sogginess from melting ice cream.
PrintWaffle Cone Recipe

This homemade waffle cone recipe teaches you how to create crispy, sweet cones perfect for serving your favorite ice cream. The batter is light and slightly mousse-like, resulting in delicate cones with a perfect balance of sweetness and texture, made using a waffle cone maker.
- Prep Time: 10 minutes
- Cook Time: 2 minutes per cone
- Total Time: 40 minutes
- Yield: 6–8 waffle cones 1x
- Category: Dessert
- Method: Baking
- Cuisine: American
- Diet: Vegetarian
Ingredients
Waffle Cone Batter
- 1 cup heavy cream
- 1 1/2 teaspoons vanilla extract
- 1 1/2 cups powdered sugar
- 1 1/2 cups all-purpose flour
- 1 tablespoon cornstarch
Instructions
- Whip the Cream: In a bowl, whisk the heavy cream and vanilla extract together until the mixture becomes mousse-like in texture, noting that it won’t form peaks.
- Combine Dry Ingredients: Sift the powdered sugar, all-purpose flour, and cornstarch together to ensure there are no lumps.
- Make the Batter: Gently stir the sifted dry ingredients into the whipped cream mixture until fully incorporated, forming a smooth batter.
- Rest the Batter: Allow the batter to sit for 30 minutes to ensure proper hydration and better texture for the waffles.
- Heat and Cook: Preheat your waffle cone maker according to the manufacturer’s instructions. Pour the batter on the hot iron and cook, slightly over-baking to achieve crispiness. Avoid undercooking to prevent sogginess.
- Shape the Cones: Immediately after cooking, quickly roll each hot waffle around the cone mold included with your waffle maker. Press firmly as you roll to ensure the cone sticks closed, and pinch the bottom hole to seal it. Use a towel or gloves to protect your hands from the heat, working quickly as the waffle hardens rapidly.
Notes
- Waffle cones harden very quickly after cooking, so shape them promptly to avoid breaking.
- Overbaking slightly helps achieve a crisp texture, preventing sogginess.
- Using a towel or heat-resistant gloves will protect your hands when shaping hot waffles.
- If you don’t have a waffle cone maker, a pizzelle maker or thin waffle iron can be used, adjusting cooking times accordingly.
Keywords: waffle cone, homemade waffle cone, ice cream cone, dessert cone, crispy waffle cone


