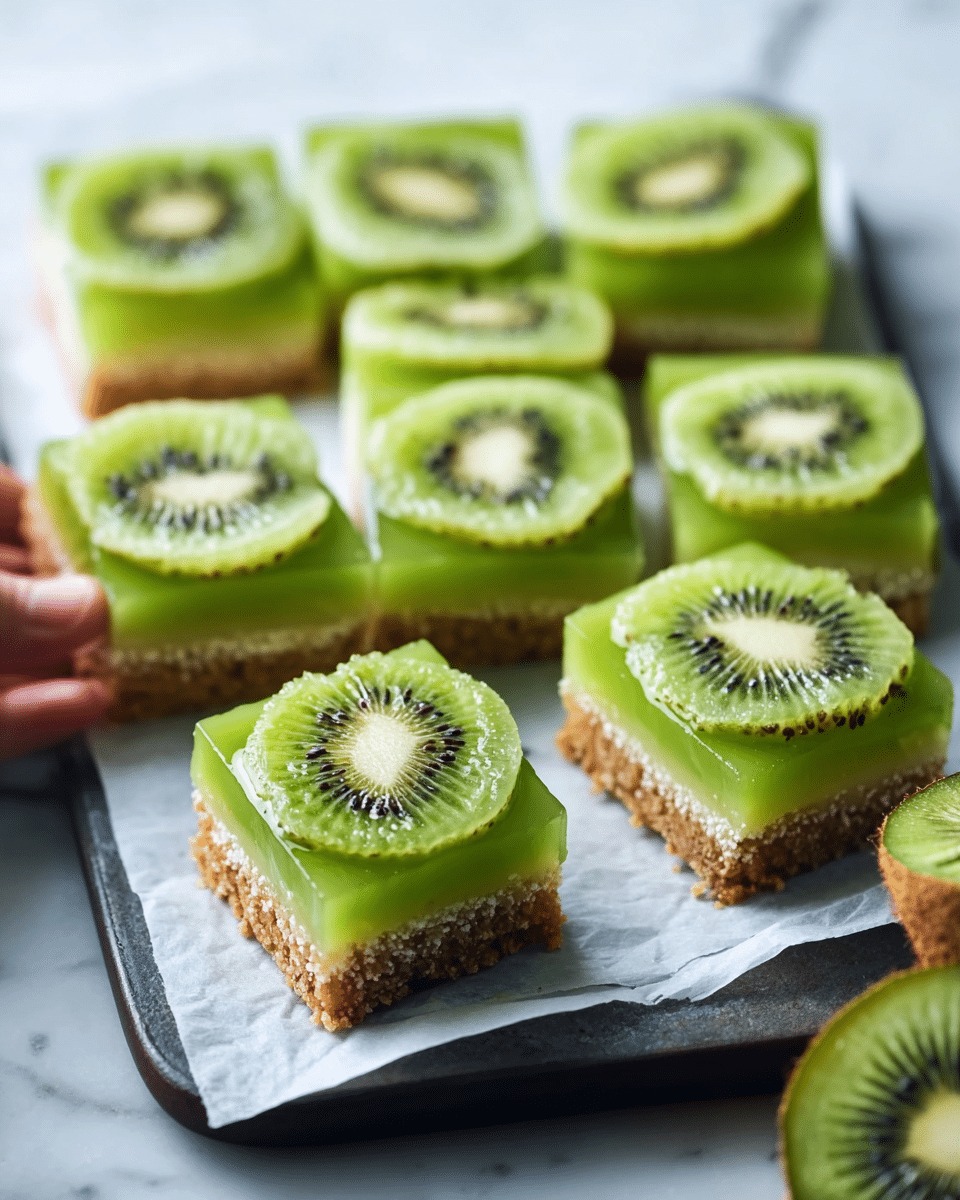
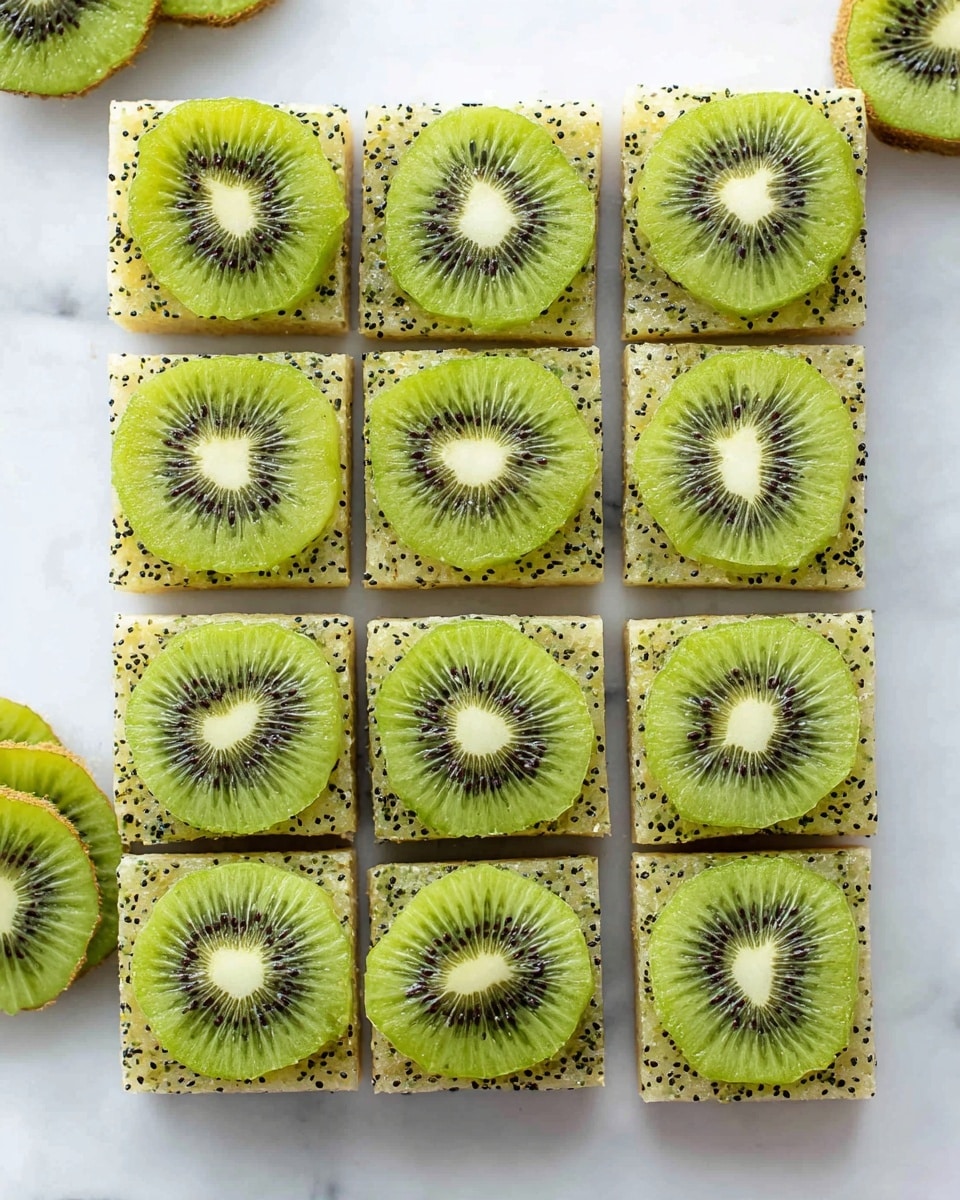
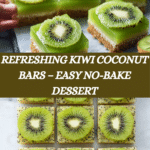
Delicious Kiwi Bars Recipe
Introduction
These delicious kiwi bars offer a refreshing twist on a classic dessert, combining the tropical flavors of coconut and kiwi with a creamy lime-infused topping. Perfect for a light treat or a summer gathering, they’re easy to make and sure to impress.
Ingredients
- 1 cup all-purpose flour
- 1 cup unsweetened coconut flakes
- 1/2 cup granulated sugar
- 1/3 cup melted coconut oil
- 1/4 teaspoon salt
- 4 ripe kiwis, sliced
- 1 cup coconut cream (or whipped topping)
- 1 tablespoon fresh lime juice
- 2 tablespoons agave syrup (optional)
Instructions
- Step 1: Preheat your oven to 350°F (175°C).
- Step 2: In a mixing bowl, combine the flour, coconut flakes, sugar, melted coconut oil, and salt.
- Step 3: Press the mixture firmly into the bottom of an 8×8 inch baking dish to form the crust.
- Step 4: Bake the crust for about 15 minutes or until it is lightly golden.
- Step 5: Allow the crust to cool completely.
- Step 6: In another bowl, mix together the sliced kiwis, coconut cream, lime juice, and agave syrup if using.
- Step 7: Pour the kiwi filling evenly over the cooled crust.
- Step 8: Refrigerate the bars for at least 2 hours to let the filling set.
- Step 9: Once set, cut into bars and serve chilled.
Tips & Variations
- For extra flavor, sprinkle a little toasted coconut on top before refrigerating.
- If you prefer a sweeter filling, increase the agave syrup or substitute with honey.
- Use fresh lime juice for the best tang, but bottled lime juice can work in a pinch.
- To make it vegan, ensure the whipped topping is plant-based or stick to coconut cream.
Storage
Store the kiwi bars in an airtight container in the refrigerator for up to 3 days. Keep them chilled and consume within this time for the best texture and flavor. If needed, let them sit at room temperature for a few minutes before serving to soften slightly.
How to Serve
Serve this delicious recipe with your favorite sides.
FAQs
Can I use frozen kiwis instead of fresh?
It’s best to use fresh kiwis because frozen ones may release excess moisture and make the filling watery. If using frozen, thaw and drain them well before mixing.
Can these bars be made ahead of time?
Yes, you can prepare the crust in advance and keep it refrigerated. Assemble the filling and chill the bars on the day of serving for the freshest taste and best texture.
PrintDelicious Kiwi Bars Recipe

These Delicious Kiwi Bars feature a crispy coconut and flour crust topped with a refreshing lime-infused kiwi and coconut cream filling. Perfectly balanced with a hint of sweetness and tang, they make a delightful chilled dessert or snack.
- Prep Time: 15 minutes
- Cook Time: 15 minutes
- Total Time: 2 hours 30 minutes
- Yield: 9 bars (3×3 squares in an 8×8 inch dish) 1x
- Category: Dessert
- Method: Baking
- Cuisine: International
- Diet: Vegan
Ingredients
Crust
- 1 cup all-purpose flour
- 1 cup unsweetened coconut flakes
- 1/2 cup granulated sugar
- 1/3 cup melted coconut oil
- 1/4 teaspoon salt
Filling
- 4 ripe kiwis, sliced
- 1 cup coconut cream (or whipped topping)
- 1 tablespoon fresh lime juice
- 2 tablespoons agave syrup (optional)
Instructions
- Preheat the Oven: Preheat your oven to 350°F (175°C) to prepare for baking the crust.
- Prepare the Crust Mixture: In a mixing bowl, combine the all-purpose flour, unsweetened coconut flakes, granulated sugar, melted coconut oil, and salt. Mix thoroughly until the ingredients are well incorporated.
- Press the Crust: Firmly press the mixture into the bottom of an 8×8 inch baking dish to form an even layer.
- Bake the Crust: Bake the crust in the preheated oven for about 15 minutes, or until it turns lightly golden in color.
- Cool the Crust: Remove the crust from the oven and allow it to cool completely to ensure the filling sets properly.
- Prepare the Filling: In a separate bowl, combine the sliced ripe kiwis, coconut cream (or whipped topping), fresh lime juice, and agave syrup if using. Mix gently until evenly combined.
- Assemble the Bars: Pour the kiwi filling over the cooled crust and spread it evenly with a spatula.
- Chill to Set: Refrigerate the assembled bars for at least 2 hours to allow the filling to firm up.
- Serve: Once set, cut the bars into squares and serve them chilled for best flavor and texture.
Notes
- Agave syrup is optional and can be replaced with honey or maple syrup for sweetness.
- Using coconut cream adds richness, but whipped topping can be a suitable substitute.
- Ensure the crust is fully cooled before adding the filling to prevent melting.
- Chilling for longer than 2 hours will help the bars firm up even more, making them easier to cut.
- These bars should be stored in the refrigerator and are best consumed within 3 days.
Keywords: kiwi bars, vegan dessert, coconut crust, chilled dessert, fruit bars, lime juice, coconut cream

