Melon Pan Recipe
Introduction
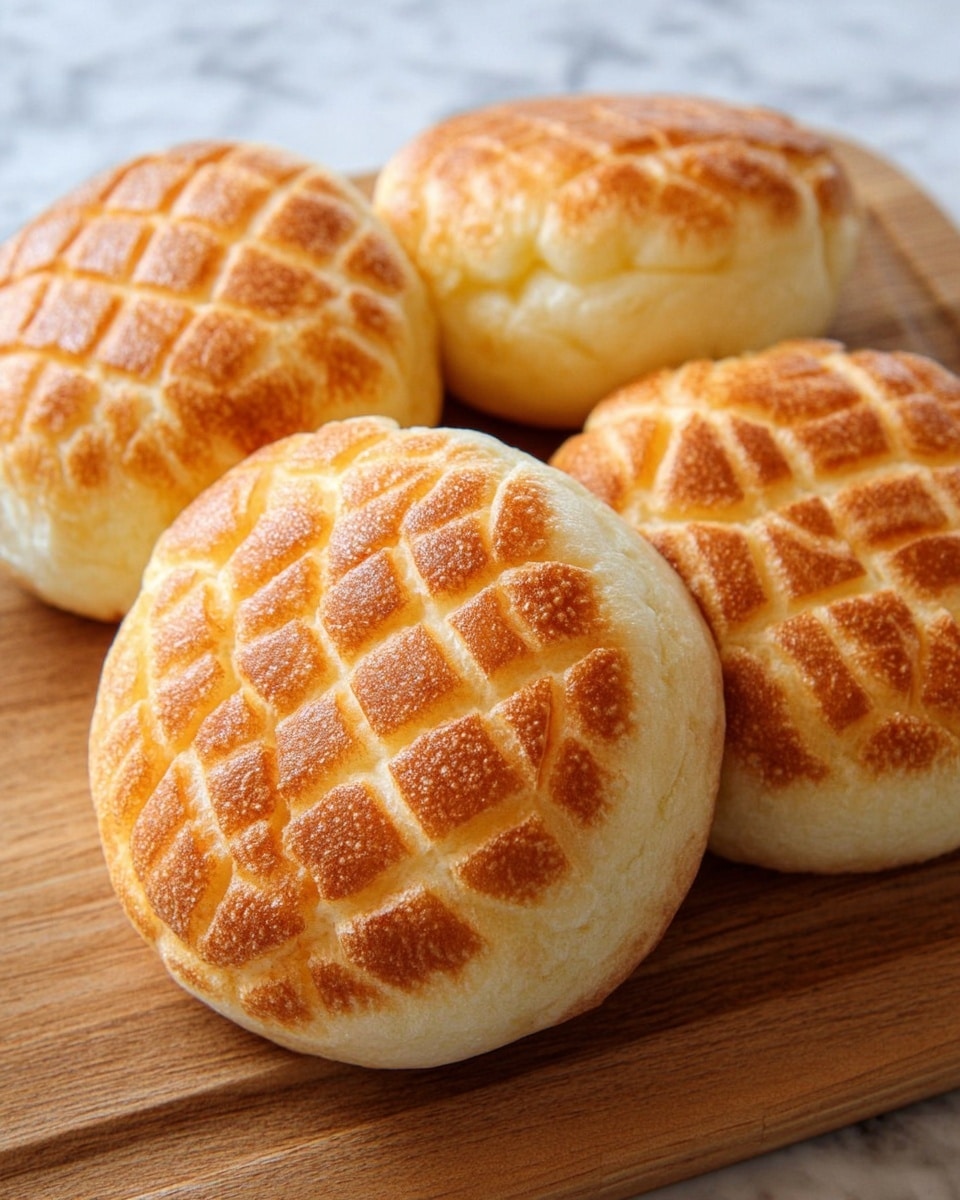
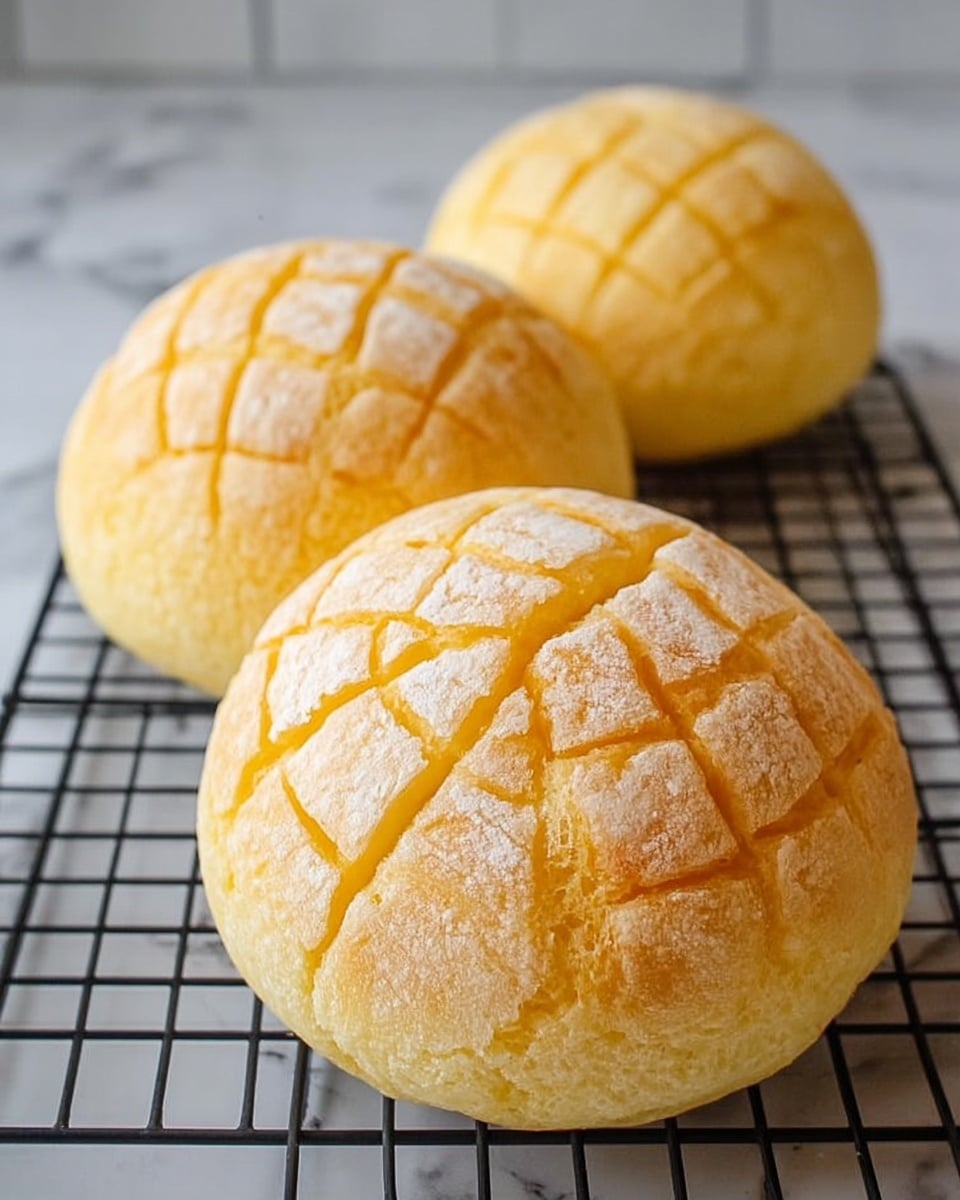
Melon Pan is a delightful Japanese sweet bread topped with a crisp, cookie-like layer that gives it a unique texture and flavor. Despite its name, it doesn’t contain melon but is loved for its soft interior and sweet, crunchy exterior. This recipe guides you through making the main dough and the biscuit topping for perfect melon pan every time.
Ingredients
- Main Dough:
- 225g bread flour (plus extra for work surface)
- 25g cake flour
- 3g kosher salt
- 40g caster sugar
- 4g instant dry yeast
- 1 large egg (beaten)
- 50ml full cream milk
- 50ml water (room temperature)
- 35g unsalted butter (cubed, room temperature)
- Biscuit Dough:
- 60g unsalted butter (room temperature)
- 100g caster sugar
- 1 large egg (beaten)
- 200g cake flour
- 2g baking powder
- Toppings:
- 2 tbsp caster sugar
Instructions
- Step 1: In a mixing bowl, whisk together the bread flour, cake flour, kosher salt, caster sugar, and instant dry yeast until well combined.
- Step 2: Add the beaten egg, milk, and room temperature water. Using an electric mixer with a dough hook, knead on low speed until the dough comes together and cleans the sides of the bowl.
- Step 3: Add the cubed unsalted butter and continue kneading on low speed until incorporated. Then increase to medium speed and knead until the dough is silky and smooth.
- Step 4: Form the dough into a smooth ball by pulling the edges downward to the bottom center and pinching it closed. Place it seam side down in a clean bowl, cover, and proof in a warm place for 1-2 hours until doubled in size.
- Step 5: Transfer the dough to a floured surface, press to deflate, fold one-third from the left and one-third from the right, then flip over and shape into a ball. Turn the dough clockwise with both hands to seal the seam.
- Step 6: Weigh and divide the dough into 10 equal portions. Shape each into a smooth ball, pulling the sides downwards and pinching at the bottom. Place on a lined tray, cover, and rest for 15 minutes at room temperature.
- Step 7: Flatten each dough ball by hand, fold in thirds from left and right, pinch the ends, and reshape into smooth balls with the seam at the bottom.
- Step 8: For the biscuit dough, cream the butter and sugar in a large bowl with an electric mixer until smooth. Gradually add the beaten egg in small increments, mixing well after each addition.
- Step 9: Sift in the cake flour and baking powder, mixing until just incorporated. Form into a ball, then divide into 10 equal portions. Shape each into a ball, place on a lined tray, cover, and chill in the fridge for 10 minutes.
- Step 10: On a lightly floured surface, flatten each biscuit dough ball by hand, then roll into 10-12cm diameter flat circles using a rolling pin.
- Step 11: Preheat your oven to 180°C (356°F).
- Step 12: Wrap each biscuit dough circle over the main dough balls, sealing all edges at the bottom. Coat the top surface with caster sugar, removing any excess gently. Using a knife, score a crisscross pattern on top.
- Step 13: Place the shaped buns on a lined baking tray, cover, and proof in a warm place for 50 minutes until about 1½ times larger.
- Step 14: Bake for 10 minutes, then rotate the tray and continue baking for another 3-5 minutes until the buns are evenly browned.
- Step 15: Remove from oven and transfer to a wire rack to cool before serving.
Tips & Variations
- Chilling the biscuit dough before rolling helps prevent sticking and ensures a tender, crisp topping.
- For added flavor, try mixing a teaspoon of vanilla extract or citrus zest into the biscuit dough.
- If you don’t have cake flour, you can substitute with all-purpose flour but the texture may be slightly less tender.
- Use a serrated knife to score the biscuit dough gently to avoid tearing the topping.
Storage
Store melon pan in an airtight container at room temperature for up to 2 days to maintain freshness. To reheat, warm them briefly in a preheated oven at 160°C (320°F) for 5 minutes to refresh the crisp topping. Avoid refrigerating as it can dry out the bread.
How to Serve
Serve this delicious recipe with your favorite sides.
FAQs
Why is it called Melon Pan if there is no melon?
Melon Pan is named for its distinctive melon-like, grid-patterned top rather than its flavor. Traditional recipes don’t include melon, though some modern variations may add melon flavor.
Can I make Melon Pan without an electric mixer?
Yes, you can knead the dough by hand. It will take more time and effort to achieve a smooth, elastic dough, usually about 10-15 minutes of kneading. Using a mixer simply speeds up the process.
PrintMelon Pan Recipe

Melon Pan is a classic Japanese sweet bread featuring a soft, fluffy bread dough covered with a thin, crisp biscuit-like layer that is scored to resemble a melon rind. The recipe includes making both the bread dough and the cookie dough topping, which are combined before baking for a deliciously sweet and slightly crunchy treat.
- Prep Time: 40 minutes
- Cook Time: 18 minutes
- Total Time: 3 hours 10 minutes
- Yield: 10 melon pans 1x
- Category: Bread
- Method: Baking
- Cuisine: Japanese
- Diet: Vegetarian
Ingredients
Main Dough
- 225g bread flour (plus extra for work surface)
- 25g cake flour
- 3g kosher salt
- 40g caster sugar
- 4g instant dry yeast
- 1 large egg (beaten)
- 50ml full cream milk
- 50ml water (room temperature)
- 35g unsalted butter (cubed, room temperature)
Biscuit Dough
- 60g unsalted butter (room temperature)
- 100g caster sugar
- 1 large egg (beaten)
- 200g cake flour
- 2g baking powder
Toppings
- 2 tbsp caster sugar
Instructions
- Make the Main Dough: In a mixing bowl, whisk together bread flour, cake flour, kosher salt, caster sugar, and instant dry yeast until well combined. Add the beaten egg, full cream milk, and room temperature water. Using an electric mixer with a dough hook, knead on low speed until the dough comes together and the sides of the bowl are clean. Add cubed unsalted butter and continue kneading on low speed until the butter is fully incorporated. Increase speed to medium and continue kneading until the dough is silky and smooth. Using your hands, form the dough into a smooth ball by pulling its edges downwards toward the bottom center and pinching the bottom together.
- First Proof: Place the dough seam side down in a clean bowl. Cover and proof in a warm place for 1 to 2 hours or until it doubles in size.
- Shape and Divide Dough: Transfer the dough to a floured surface and press it down to deflate. Fold one-third from the left over, then one-third from the right. Flip the dough over and shape it into a smooth ball, turning it clockwise with both hands while sealing the seam with the work surface. Weigh and divide the dough into 10 equal portions, kneading each portion into smooth balls by pulling the sides down to the bottom. Place onto a lined tray, cover with cling wrap, and rest for 15 minutes at room temperature.
- Pre-shape Dough Balls: Flatten each dough ball with your hands, fold one-third from the left, then one-third from the right, pinch both ends together to form a ball, and pull the edges down to create a smooth surface with the seam on the bottom.
- Make Biscuit Dough: In a large bowl, use an electric mixer to cream together unsalted butter and caster sugar until smooth. Gradually add the beaten egg in small portions, mixing well after each addition. Sift in cake flour and baking powder, mixing until fully incorporated. Form the biscuit dough into a ball.
- Divide Biscuit Dough: Weigh and divide biscuit dough into 10 equal portions. Roll each into balls and place on a lined baking tray. Cover with cling wrap and chill in the refrigerator for 10 minutes. Then, on a lightly floured surface, flatten each portion by hand and roll into 10–12cm flat circles with a rolling pin.
- Assemble Melon Pan: Preheat the oven to 180°C (356°F). Wrap each biscuit dough circle over a main dough ball, sealing all edges together at the bottom. Coat the surface lightly with caster sugar and gently shake off the excess. Score the surface with a knife in a crisscross pattern to resemble a melon.
- Final Proof: Place the assembled melon pan on a lined baking tray and proof covered in a warm place for 50 minutes or until they have increased in size by one and a half times.
- Bake: Bake in the preheated oven for 10 minutes. Rotate the baking tray, then bake for an additional 3 to 5 minutes to ensure the buns are evenly browned and the biscuit crust is slightly golden.
- Cool: Remove from oven and transfer the melon pan to a wire rack. Allow to cool completely before serving.
Notes
- Use fresh yeast and soften butter to room temperature for easy incorporation.
- Proofing times may vary depending on room temperature; ensure dough doubles in size to get a fluffy texture.
- Be gentle when scoring the biscuit dough to avoid cutting too deeply and tearing.
- Melon Pan is best enjoyed the same day for optimal texture, though it can be stored in an airtight container for up to 2 days.
- If you prefer, you can add a vanilla or matcha powder to the biscuit dough for flavor variation.
Keywords: Melon Pan, Japanese sweet bread, biscuit topped bread, soft bread recipe, Japanese bakery


