Peanut Butter Cottage Cheese Cheesecake Cups Recipe
Introduction
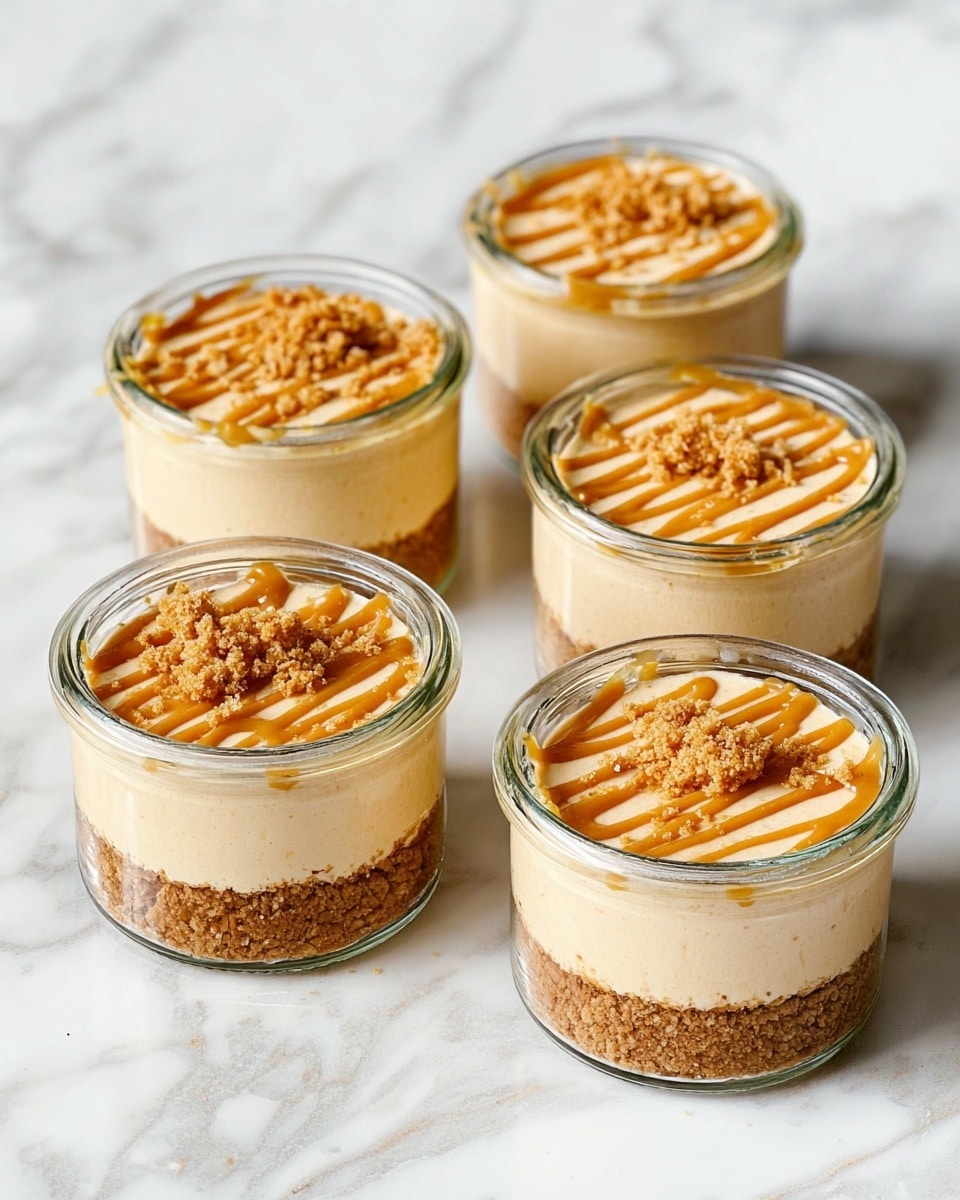
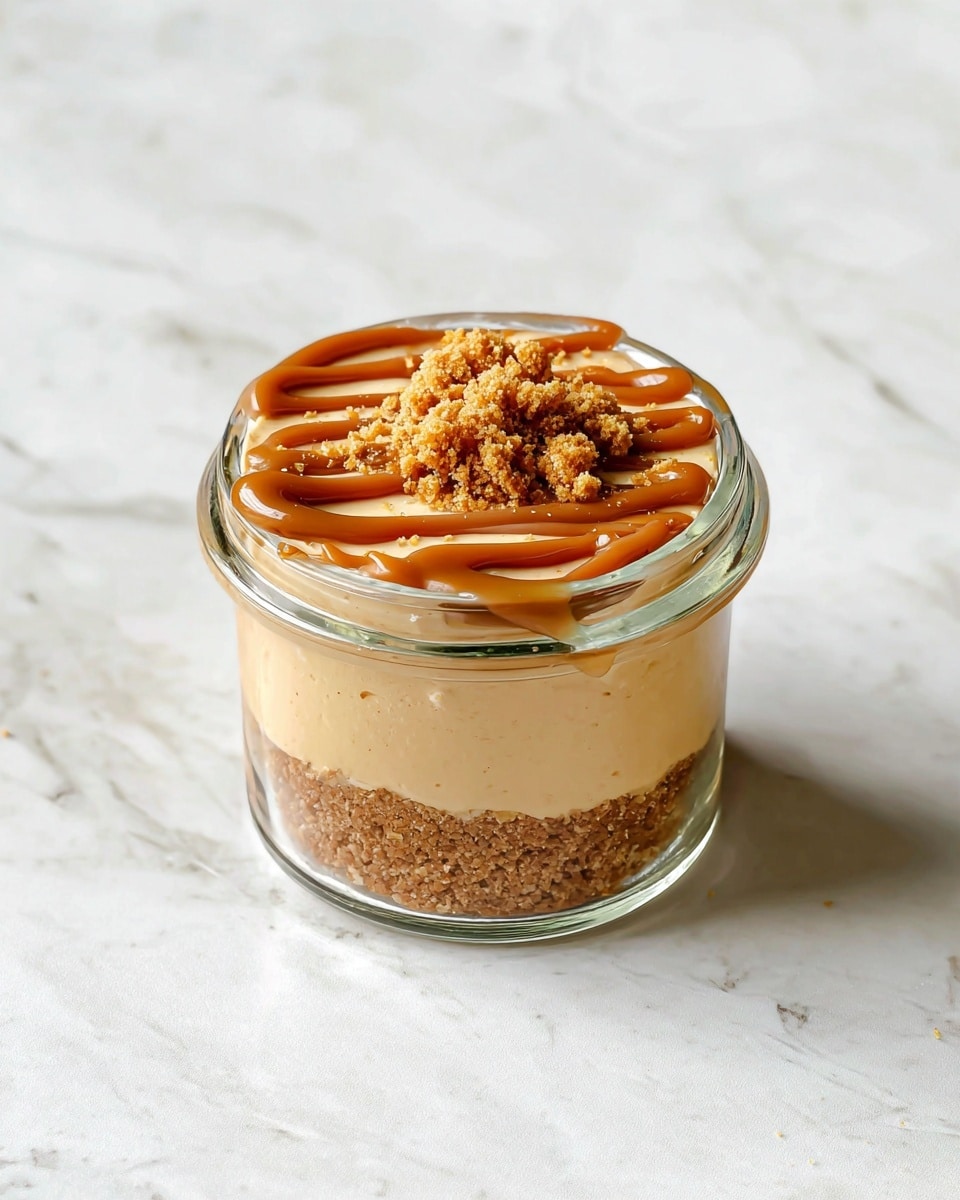
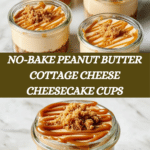
These Peanut Butter Cottage Cheese Cheesecake Cups are a delightful, protein-packed treat. Creamy and smooth with a crunchy graham cracker crust, they’re perfect for a quick dessert or a satisfying snack.
Ingredients
- 1 cup creamy peanut butter
- 1 cup full-fat cottage cheese
- 4 ounces cream cheese, softened
- 1/4 cup honey
- 1 teaspoon vanilla extract
- 1/2 cup crushed graham crackers
- 2 tablespoons melted peanut butter (for topping)
Instructions
- Step 1: Add the cottage cheese, softened cream cheese, honey, and vanilla extract to a blender. Blend until the mixture is smooth and creamy, about 1 to 2 minutes, scraping down the sides as needed.
- Step 2: Pour the blended mixture into a bowl and stir in the creamy peanut butter until fully combined and smooth.
- Step 3: Spoon about 2 tablespoons of crushed graham crackers into the bottom of each of the 4 glass jars. Press down gently with the back of a spoon to form a crust.
- Step 4: Divide the peanut butter cheesecake mixture evenly among the jars, spooning it over the crust and smoothing the tops.
- Step 5: Drizzle the melted peanut butter over each cheesecake cup. Optionally, swirl it gently with a toothpick. Refrigerate the jars for at least 1 hour to set before serving.
Tips & Variations
- For a nut-free version, substitute the peanut butter with sunflower seed butter and use nut-free graham crackers.
- If you prefer a sweeter cheesecake, add a bit more honey or a touch of maple syrup to the blender.
- Top with chopped peanuts or chocolate chips for added texture and flavor.
Storage
Store the cheesecake cups in the refrigerator in airtight containers for up to 3 days. For best texture, consume within this period. To serve, you can enjoy them chilled straight from the fridge—no reheating needed.
How to Serve
Serve this delicious recipe with your favorite sides.
FAQs
Can I use low-fat cottage cheese instead of full-fat?
Yes, you can use low-fat cottage cheese, but the cheesecake will be less creamy and rich. Full-fat versions yield a smoother texture and fuller flavor.
Do I have to use cream cheese?
Cream cheese adds the classic cheesecake texture and taste. If you omit it, the dessert will be less traditional and more like a peanut butter mousse. For best results, include it.
PrintPeanut Butter Cottage Cheese Cheesecake Cups Recipe
These Peanut Butter Cottage Cheese Cheesecake Cups offer a creamy, protein-packed dessert that combines the rich flavors of peanut butter and cream cheese with the wholesome texture of cottage cheese. Perfect for a quick make-ahead treat, these no-bake cheesecake cups are layered over a crunchy graham cracker crust and topped with a peanut butter drizzle for added indulgence.
- Prep Time: 10 minutes
- Cook Time: 0 minutes
- Total Time: 1 hour 10 minutes
- Yield: 4 servings 1x
- Category: Dessert
- Method: No-Cook
- Cuisine: American
- Diet: Vegetarian
Ingredients
Cheesecake Mixture
- 1 cup full-fat cottage cheese
- 4 ounces cream cheese, softened
- 1/4 cup honey
- 1 teaspoon vanilla extract
- 1 cup creamy peanut butter
Crust and Topping
- 1/2 cup crushed graham crackers
- 2 tablespoons melted peanut butter (for topping)
Instructions
- Blend the Base: Add the full-fat cottage cheese, softened cream cheese, honey, and vanilla extract to a blender. Blend on high for 1–2 minutes until the mixture is completely smooth and creamy. Scrape down the sides as necessary to ensure an even blend.
- Mix in Peanut Butter: Pour the blended mixture into a mixing bowl. Add the creamy peanut butter and stir thoroughly until the mixture is thick, smooth, and light brown in color.
- Add the Crust Layer: Spoon approximately 2 tablespoons of crushed graham crackers into the bottom of each of four glass jars. Press the crumbs down gently with the back of a spoon to form a firm base layer.
- Fill the Cups: Divide the peanut butter cheesecake mixture evenly among the prepared jars, spooning it over the graham cracker crust. Smooth the tops with a spoon for a neat finish.
- Add the Topping: Drizzle the melted peanut butter evenly over the tops of the cheesecake cups. Optionally, swirl the topping gently with a toothpick for a decorative effect. Refrigerate the jars for at least 1 hour to allow the cheesecake cups to firm up before serving.
Notes
- For a lighter texture, use low-fat cottage cheese and cream cheese.
- Honey can be substituted with maple syrup or agave nectar for a vegan option.
- Use crunchy peanut butter for added texture in the cheesecake mixture, if desired.
- These cups can be stored covered in the refrigerator for up to 3 days.
- To make them dairy-free, substitute the cream cheese and cottage cheese with plant-based alternatives.
Keywords: Peanut Butter Cheesecake, No-Bake Cheesecake, Cottage Cheese Dessert, Healthy Dessert, Protein-Packed Dessert, Easy Cheesecake Cups
